
A Beginner’s Guide to Home Beer Making
Dreaming of crafting your own unique brews? Homebrewing beer is a rewarding hobby that allows you to experiment with flavors, save money, and share your creations with friends. While it might seem daunting at first, the basic principles are straightforward. This guide will walk you through the essential equipment, ingredients, best practices, and the time commitment involved in brewing your very own beer.
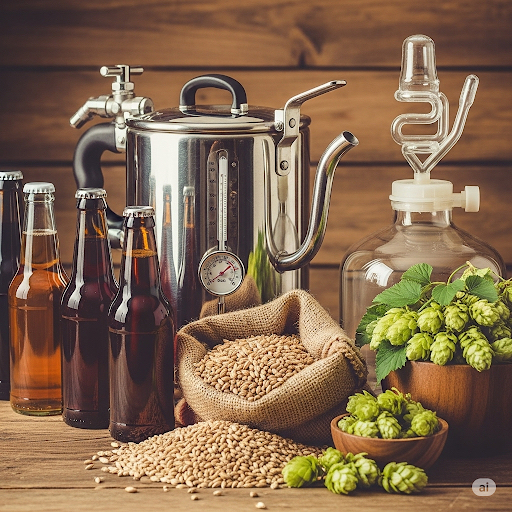
The Essentials: Equipment You’ll Need
To get started, you don’t need a sprawling commercial brewery. Many starter kits are available, but here’s a breakdown of the key pieces of equipment:
Brew Kettle: A large pot (at least 5 gallons for a 5-gallon batch) for boiling your wort (unfermented beer). Stainless steel is preferred for its durability and ease of cleaning.
Fermentation Vessel: A food-grade bucket or glass carboy (5-6 gallons) where your wort will ferment. It needs an airtight seal and a stopper with an airlock.
Airlock: A device that allows carbon dioxide (a byproduct of fermentation) to escape while preventing outside air and contaminants from entering the fermenter.
Thermometer: Crucial for monitoring temperatures during steeping, boiling, and cooling.
Hydrometer and Test Jar: Used to measure the specific gravity of your wort and beer, allowing you to track fermentation progress and calculate alcohol content.
Sanitizer: Absolutely vital! A no-rinse sanitizer like Star San is highly recommended to prevent unwanted bacteria and wild yeasts from spoiling your beer.
Siphon/Auto-siphon and Tubing: For transferring wort and beer between vessels without disturbing sediment.
Bottles or Keg: For packaging your finished beer. If bottling, you’ll need bottles (amber is best for light protection), bottle caps, and a capper. If kegging, a keg, CO2 tank, and dispensing equipment.
Stirring Spoon: A large, heat-resistant spoon for stirring during the boil.
Grain Bag (for extract brewing with specialty grains): A mesh bag to steep specialty grains.
Bottle Brush and Bottle Washer (if bottling): For cleaning bottles thoroughly.
The Heart of the Beer: Essential Ingredients
Beer is primarily made from four core ingredients:
Malted Barley (or Malt Extract): This provides the fermentable sugars that yeast convert into alcohol and CO2.
Malted Grains (All-Grain Brewing): Barley that has been steeped, germinated, and dried. Different malts contribute varying colors, flavors, and aromas.
Malt Extract (Extract Brewing): A concentrated syrup or powder made from malted barley. This simplifies the process by skipping the “mashing” step, making it ideal for beginners.
Hops: These flowers add bitterness to balance the sweetness of the malt, as well as aroma and flavor. Hops are typically added at different stages of the boil to achieve desired effects.
Yeast: The magical microorganism responsible for fermentation. Different yeast strains produce distinct flavor profiles. There are two main types for homebrewing:
Ale Yeast: Ferments at warmer temperatures, producing fruity and complex flavors.
Lager Yeast: Ferments at colder temperatures, resulting in cleaner, crisper beers.
Water: Often overlooked, water quality and mineral content significantly impact the final taste of your beer. If your tap water has a strong chlorine taste, consider using filtered or spring water.
Best Practices for Brewing Success
Success in homebrewing hinges on a few critical principles:
Sanitation is Paramount: This cannot be stressed enough. Any equipment that comes into contact with your wort after it has been boiled (the “cold side” of brewing) must be meticulously cleaned and sanitized. Contamination by wild yeast or bacteria is the quickest way to ruin a batch.
Temperature Control: Maintaining the correct temperatures during steeping, boiling, cooling, and especially fermentation is crucial for yeast health and desired flavor development. Invest in a good thermometer and find a consistent spot for your fermenter.
Fresh Ingredients: Always use fresh ingredients. Old hops can develop off-flavors, and stale malt or yeast can lead to poor fermentation and undesirable results. Store hops in the freezer and liquid yeast in the refrigerator.
Patience: Brewing takes time. Don’t rush fermentation or conditioning. Allowing your beer to fully ferment and mature will yield a much better-tasting product.
Take Detailed Notes: Record your process, ingredients, temperatures, and observations for each batch. This will help you troubleshoot issues, replicate successful brews, and improve your technique over time.
Cool the Wort Quickly: After boiling, chilling your wort rapidly to pitching temperature (the ideal temperature for your yeast) helps prevent off-flavors and reduces the risk of infection. An immersion wort chiller is a great investment for this.
Aerate Your Wort: Before pitching yeast, oxygenating your cooled wort is important. Yeast need oxygen to reproduce effectively in the initial stages of fermentation. Shaking your fermenter vigorously for a couple of minutes can do the trick.
Some Common Pitfalls of Home Brewing and How to Avoid Them:
Every homebrewer has a story about a batch that went sideways—a gusher of a bottle, a beer that tasted “off,” or a brew day that ended with a sticky kitchen floor. While these are valuable learning experiences, you can sidestep some of the most common frustrations with a little foresight. Here are some frequent pitfalls and tips to keep your brewing journey smooth.
The Dreaded Boilover: One of the first rites of passage for a new brewer is cleaning up a sticky, boiled-over wort. This happens when proteins in the wort coagulate during the boil (the “hot break”), creating a rapid foam-up.
The Fix: Use a kettle that is at least 1.5 to 2 times the volume of your boil. Keep a close eye on the pot as it comes to a boil and be ready to reduce the heat immediately. A spray bottle filled with water can also help beat back the foam. For a more foolproof method, a few drops of a food-grade, anti-foaming agent like Fermcap-S can prevent boilovers entirely.
Mistreating Your Yeast: Yeast are living organisms, and they are the engines of fermentation. Pitching them into wort that is too hot will kill them, while pitching them into wort that is too cold can make them sluggish.
The Fix: Always cool your wort to the recommended fermentation temperature for your yeast strain before pitching. For liquid yeast, consider making a “yeast starter” a day or two before brew day, especially for higher gravity beers. This builds up the yeast cell count, ensuring a strong and healthy fermentation. If using dry yeast, be sure to rehydrate it according to the package directions.
The “Stuck” Fermentation Panic: You notice the bubbling in your airlock has stopped days before you expected it to. Is the batch ruined? Probably not! A “stuck” fermentation, where the yeast stop working prematurely, is often caused by a sudden drop in temperature.
The Fix: First, use your hydrometer to confirm the fermentation is actually stuck and not just finished. If it is stuck, try moving your fermenter to a slightly warmer, stable location (a few degrees can make a big difference). You can also try gently swirling the fermenter to rouse the yeast back into suspension.
Malt Extract Quality (DME vs. LME): For extract brewers, the quality of your malt extract is paramount. While Liquid Malt Extract (LME) is common in kits, it has a shorter shelf life and can darken over time, potentially adding a slight “extract twang” to your beer, especially if it’s not fresh.
The Fix: For this reason, many experienced brewers, myself included, prefer using Dry Malt Extract (DME) exclusively. While it might cost a little more, DME is more stable, has a longer shelf life, and is less prone to darkening or developing off-flavors. It’s also easier to measure precisely. In my experience, it consistently leads to a cleaner, higher-quality brew and is well worth the slight extra expense.
The Oxidation Monster: After fermentation is complete, oxygen becomes the enemy of your beer. Exposing your finished beer to oxygen, for example, by splashing it during transfer to a bottling bucket or keg, can lead to stale, cardboard-like flavors.
The Fix: When siphoning your beer, ensure the end of the tubing is placed at the very bottom of the receiving vessel (your bottling bucket or keg). This allows the beer to fill from the bottom up, minimizing splashing and oxygen exposure. Alternatively, you could invest a trivial amount into a plastic fermentation device with a spigot attached to the bottom; that way the beer gets transferred straight away without being exposed to oxygen in the air.
The Brewing Timeline: How Much Time Does it Take?
The total time from start to finish can vary, but here’s a general breakdown for a typical 5-gallon batch of ale:
Brew Day (Boil Day): This is the most active part, usually taking 3-5 hours. This includes steeping grains (if applicable), boiling the wort, adding hops, and chilling.
Primary Fermentation: 1-2 weeks. During this period, the yeast actively converts sugars into alcohol and CO2. You’ll observe bubbling in the airlock.
Secondary Fermentation (Optional): 1-2 weeks. Some brewers transfer the beer to a secondary fermenter to clarify it and allow for further conditioning. This step is often skipped by beginners for simpler recipes.
Bottling/Kegging: 1-2 hours. This involves cleaning and sanitizing bottles or a keg, transferring the beer, and adding priming sugar (for bottle conditioning) or force carbonating (for kegging).
Conditioning/Carbonation: 1-4 weeks (or longer).
Bottle Conditioning: The beer carbonates naturally in the bottles as residual yeast consumes the priming sugar. This typically takes 2-3 weeks at room temperature.
Kegging: Force carbonation in a keg can be achieved in a few days to a week.
Total Time from Start to Finish: Expect to wait anywhere from 2.5 to 8 weeks before your beer is ready to drink, with most ale recipes falling in the 3-4 week range. Lagers, with their colder and slower fermentation, take considerably longer, often 6-8 weeks or more.
Homebrewing is a journey of continuous learning and experimentation. Begin with a simple extract kit to get a feel for the process, then gradually explore all-grain brewing, different ingredients, and advanced techniques. With proper sanitation, patience, and a dash of creativity, you’ll soon be enjoying the satisfaction of pouring a glass of your very own delicious homemade beer. So, go ahead and start your brewing journey — Cheers!
